No-Yeast Whole Wheat Bread Recipe – Quick and Easy Homemade Bread
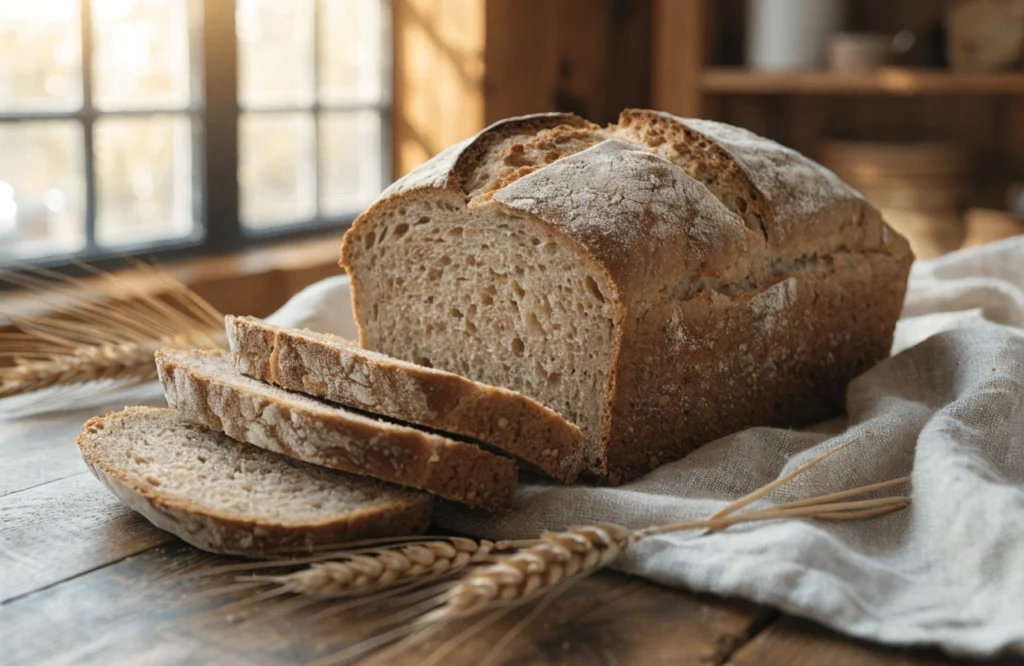
Sometimes you need fresh homemade bread but don’t have hours to wait for dough to rise. This No-Yeast Whole Wheat Bread is the perfect solution. Made with wholesome whole wheat flour, all-purpose flour, and buttermilk, this rustic bread comes together quickly and bakes into a delicious loaf with a golden crust and tender crumb.
Ideal for breakfast, soups, sandwiches, or serving alongside your favorite meals, this easy bread recipe is a lifesaver for busy days.
Table of Contents
Why You’ll Love This Recipe
- No yeast required
- No waiting for dough to rise
- Ready in about one hour
- Rustic homemade flavor
- Perfect for beginners
- Great for sandwiches and toast
Ingredients
For the Bread
- 250 g whole wheat flour
- 250 g all-purpose flour
- 1½ teaspoons fine salt
- 1 teaspoon baking soda
- 300 ml buttermilk
For the Baking Sheet
- 20 g butter
- 20 g flour
Equipment Needed
- Large mixing bowl
- Baking sheet
- Sharp knife
- Cooling rack
How to Make No-Yeast Whole Wheat Bread
Step 1: Preheat the Oven
Preheat your oven to 230°C (450°F).
In a large bowl, sift together the all-purpose flour, salt, and baking soda. Add the whole wheat flour and mix well.
Step 2: Make the Dough
Create a well in the center of the flour mixture.
Pour in the buttermilk and mix until a dough forms. If the dough feels too dry, add a small amount of warm water until it becomes smooth and evenly combined.
Step 3: Shape the Loaves
Divide the dough into two equal portions.
Shape each portion into a round loaf.
Flatten slightly and use a sharp knife to cut a deep cross on the top of each loaf.
Step 4: Prepare for Baking
Butter a baking sheet and lightly dust it with flour.
Place the loaves on the prepared baking sheet.
Cover each loaf with a square baking mold or an oven-safe cover at least 15 cm (6 inches) wide.
Place the baking sheet on the upper third rack of the oven.
Step 5: First Bake
Bake for 15 minutes.
Step 6: Finish Baking
Remove the covers and continue baking for an additional 15 to 20 minutes until the loaves are beautifully golden brown.
Step 7: Cool Before Serving
Transfer the bread to a wire rack.
Allow the loaves to cool for approximately 45 minutes before slicing and serving.
Tips for Success
Don’t Overmix the Dough
Mix only until the ingredients are combined to keep the bread tender.
Use Fresh Baking Soda
Fresh baking soda ensures proper rise and texture.
Score the Dough Deeply
The cross-cut helps the bread bake evenly and creates the traditional rustic appearance.
Let It Cool
Cooling allows the crumb to set and improves texture.
Serving Suggestions
This bread pairs perfectly with:
- Butter and jam
- Soups and stews
- Cheese platters
- Breakfast spreads
- Sandwich fillings
- Homemade preserves
Storage Instructions
Room Temperature
Store in an airtight container for up to 3 days.
Refrigerator
Store for up to 1 week.
Freezer
Freeze sliced bread for up to 3 months.
Frequently Asked Questions
Why doesn’t this bread need yeast?
The baking soda reacts with the acidity of the buttermilk, creating carbon dioxide that helps the bread rise.
Can I substitute buttermilk?
Yes. Mix 300 ml milk with 1 tablespoon lemon juice or vinegar and let it sit for 10 minutes.
Can I make one large loaf instead of two?
Absolutely. Increase the baking time slightly and monitor until golden brown.
Is this bread healthy?
Yes. Whole wheat flour provides fiber, vitamins, and minerals, making this a nutritious homemade bread option.
Can I add seeds or nuts?
Yes. Sunflower seeds, pumpkin seeds, walnuts, or oats make excellent additions.
Conclusion
This No-Yeast Whole Wheat Bread is proof that homemade bread doesn’t have to be complicated. With simple pantry ingredients and no rising time, you can enjoy fresh, rustic bread whenever you want. Whether served warm with butter or used for hearty sandwiches, this easy recipe is sure to become a favorite in your kitchen.